Tackle companies that make pole anchors – for securing your pole rigs to winders – sell tens of thousands of them every year.
But here at tcf we wonder if those people who buy them are also throwing away unused bits of pole elastic.
All those unused lengths of elastic can quickly be turned into excellent pole anchors which can be made in under a minute costing you, in effect, nothing.
And that’s a real boon if you, like us, always seem to find one missing when you pack up at the end of the day.
In terms of what strength to use most elastics will do fine, although you don’t want to use the heavier elastics on rigs tied with light lines.
The other problem with elastics heavier than a No8 is that the knots are quite large, so the winders don’t always sit flush on the bottom of the winder tray in your box. All things being equal the best elastics to use are from No3 to No6.
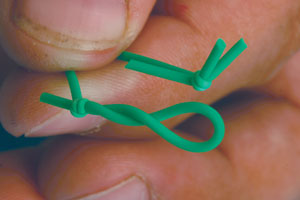
There are two easy-to-make versions shown here. Neither anchor has the ‘hook’ you get on pole anchors bought in the shops,
The first one works on the principal that as long as the line and elastic are tight the loop in the top of the rig will grab the knot in the elastic securely.
On the second a staple is used to grab the loop at the end of the rig and the large elastic loop created grabs the pin on the pole winder.
As long as the elastic isn’t starting to perish (which will happen if you leave it in direct sunlight for too long) these should last you ages.
Tcf Tool Box
A few lengths of unused pole elastic
A pair of scissors
A rig that needs securing to a winder
A staple gun and some staples
Something to keep your pole anchors in
No1: Just With Elastic
 |
Step 1
Take about an 8-10-inch length of elastic – don’t use the heavier elastics on rigs tied with light lines. |
|
 |
Step 2
You need to tie an overhand knot in the end. Start by folding the elastic over at the end to create a loop. |
|
 |
Step 3
Grab the end of the loop, and start stretching it around your first and second fingers. |
|
 |
Step 4
Fold the doubled-up elastic over itself… |
|
 |
Step 5
… and thread it through the large loop you’ve created around your fingers. |
|
 |
Step 6
Grab the end of the loop with your other hand. |
|
 |
Step 7
Keep pulling to form the overhand loop knot. |
|
 |
Step 8
Pull hard to tighten down the knot. |
|
 |
Step 9
That’s your overhand knot completed. |
|
 |
Step 10
Pinch so that the loose end and the loop sit together like this. |
|
 |
Step 11
Cut across all three pieces of elastic with the scissors. |
|
 |
Step 12
This is what grabs the loop in the end of the rig on a tight elastic. |
|
 |
Step 13
Tie another overhand loop in the other end, but just trim off the loose end. |
|
 |
Step 14
This loop is what grabs the pin on the winder. |
|
 |
Step 15
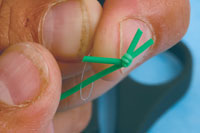
Thread the ragged end through the loop in the end of the pole rig. |
|
 |
Step 16
Pull tight so the loop locks onto the elastic. |
|
 |
Step 17
Keeping things tight, pull it around the winder and place the loop in the elastic over the pin on the winder. Job done! |
|
|
No2: With A Stapler
 |
Step 1
Fire some staples onto the staple gun plate so they are squashed as shown. |
|
 |
Step 2
Open up one end of the staple and place a six-inch length of elastic into it. |
|
 |
Step 3
Now close down the staple with your fingernail to keep the elastic in place. |
|
 |
Step 4
Tie an overhand knot in the elastic as shown in the previous sequence, and trim off loose ends. |
|
 |
Step 5
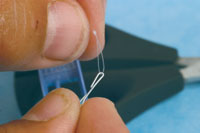
Grab the loop in the end of your rig with the other end of the staple. |
|
 |
Step 6
Pull the elastic around the winder and secure with the pin inside the elastic loop. |
|

![]()

